The Creation

The Chapel Interior

I have received a lot of questions as to how such a faithful recreation of the space, down to a few centimeters, could be created for such an inaccessible location. The answer is largely twofold.


Historical Record

First, we relied on historical drawings and meticulous documentation. Paul Letarouilly is a famous French architectural historian. He would draw up schematics documenting famous places, down to the millimeter. His drawings and schematics are even currently being used in the rebuilding of Notre Dame! He documented the Sistine Chapel, as part of his Vatican series. These engravings from the 1800s were instrumental in creating the project:

 
Modern Photogrammetry

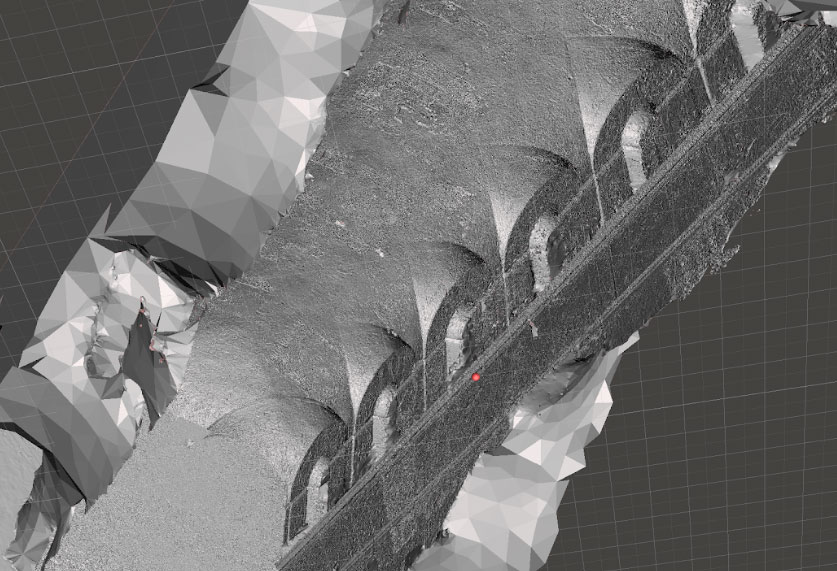
Next up was relying on modern photogrammetry (PG) to better align the hand authored meshes to real-world data. This is essentially measuring distances between features in photos and generating a rough model. The ceiling is plastered by hand and very organic –a form that can’t be described by Letarouilly’s drawings above, nor did he really try.

I was on the first team that used PG in games (Crytek PhotoBump, 2006), and shipped the first commercial PG software for that purpose. I have used PG techniques for over a decade across many projects, and I like to joke that it “works great for rocks” because it works best when every centimeter of an object is unique and it’s surface is relatively matte.

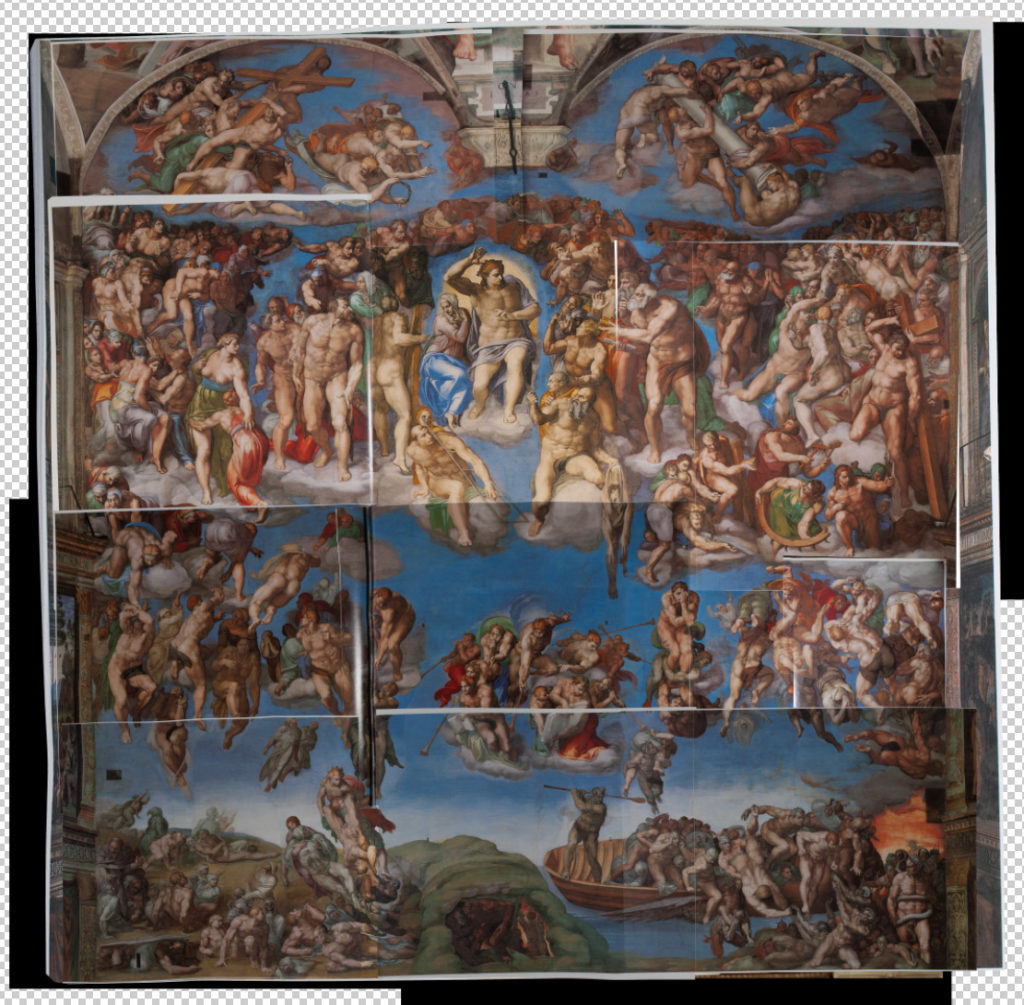
I was presenting the Il Gigante at Oculus Research and someone in the audience asked why we relied on sub millimeter laser scans from Stanford, when we could have used photogrammetry. I discussed how the surface is polished marble, and that the CyberWare data from the 1990s is still a billion points -really great! Nothing PG could touch for a sculpture like that. But later it hit me, the Sistine Ceiling is essentially the photogrammetric equivalent of a rock, six thousand feet of painted fresco (matte) -every inch completely unique.

Over the next days, I wrote a python script to trawl publicly available photos and use their measurements in Capturing Reality, a modern photogrammetry software. The results were amazing, I was able to reconstruct the vault down to about 5cm accuracy:


The Frescoes

Over the years I had spent a lot of time on acquisition of high res images of Michelangelo’s work. I have amassed quite a collection of books, and have access to many more through friendships with historians who study the ceiling.  I have also traveled to rare document collections, like the Prints and Drawings Study Room of the Victoria and Albert Museum in London. Because taking a photo of a public domain work doesn’t extend it’s copyright, you are allowed to scan or photograph these prints and elephant folios. Don’t be fooled by a museum telling you that it owns the copyright to a 500 year old painting –that’s not possible.

The Conundrum: Reprojection

My goal was to reproduce the ceiling down to teaching quality. Where possible I wanted people to see brush strokes and cracks in the plaster.

So.. every photo taken of the Sistine ceiling vault has some slight perspective distortion, they’ve all been captured from some distance away. Every photo has been taken with a different film or sensor, a different lens, under different lighting conditions  –even the best images, that slavishly attempt to reproduce the frescoes, is very inconsistent and distorted.

This presents a massive challenge if you wanted to say.. reproject images onto a curved vault across 100 UDIMs.

As you can see above, I decided to layout the UVs in a way that would make reprojection easier. Hide and mask the borders in the fuax architecture.

I am not an environment artist by trade, though I do battle Maya on a daily basis. I decided to try and do as much as I could in Maya, but the software’s baking tools are abysmal. So much time was spent on this reprojection that I ended up writing a Maya tool to batch reproject my maps. Towards the end of the project, I had a machine baking almost every night, this allowed me to really tweak projections and UVs without losing time.

The Next Issue: Color

All images of the Sistine ceiling widely vary in color temperature. Over the years, they have changed the lights from tungsten with open windows and natural sunlight, to yellow cast halogen, to some new LED technology that boasts “Not even the master himself could have imagined that [his work] could look like this!” (Which, is just a terrible quote btw)

I had to choose what general feel I wanted the chapel to have, I settled on the color temperature before the LED extravaganza, which was slightly warm yellow.

Years ago I had written something in Matlab to cast one eye of the Fuji FinePix 3D camera into the avg colorspace of the other, because each sensor white-balanced differently. I built on this to try and cast all images I pieced together into a consistent-feeling color space.

I used a coarse interpolation to cast all scanned images into a consistent colorspace, the new Photoshop tool ‘Match Color…‘ was also very helpful for some final touches.

Above is an example, a 3+GB photoshop file of the Michelangelo’s Last Judgment. This was pieced together from many elephant folios and books, but notice how the exposure and color temperature is widely different across all the images? So I would find a single photo that I liked for an area, or this entire wall, and then use it as I stated above, to interplolate and cast all the stitched together images into one  consistent whole.


The Future

I am pretty happy with how the piece turned out, we hit almost all of my stretch goals, including a reprojection of the ceiling as it existed before the controversial cleaning.

Pre-cleaned Work
The above said, I would like to use a better dataset, there are a few hard-to-find testaments left, but they’re not the easiest to get ahold of, those books, the final photographic survey of the ceiling cost between two thousand and four thousand dollars!

Giornata
I discuss ‘giornata‘ in the experience and blend in all 16 days of work Michelangelo did on the Creation of Man. I would like to convert the entire ceiling into individual giornata, so that a visitor can watch the entire ceiling, from entrance to lunettes and then altar wall be painted day by day in order.

Marks in the Plaster
Michelangelo used ‘cartoons‘ for most of the ceiling, I discuss this in the experience. But towards the end he started drawing with a knife, excising directly into the plaster. There’s been a survey of these markings, here’s what they look like lit at a raking angle:

It would be great to incorporate these into the normal map and allow the visitor to inspect the surface with a hand held light.